


Youth Soccer Speed Drills: 7 Drills That Work

A faster straight-line sprint doesn't automatically make a player faster around a curve. In a randomized study of U16 soccer players, linear and curvilinear sprint training both improved linear sprint performance, but only curvilinear training significantly improved curvilinear sprinting. Coaches need to train the movement a player needs, not assume every speed drill transfers equally.
First-step quickness and controlled changes of direction deserve priority when a player struggles to reach a loose ball, escape pressure, or recover defensively. That doesn't make top speed unimportant. It means speed is a collection of skills, and quick ladder feet, powerful acceleration, effective braking, and good decisions aren't interchangeable.
Useful youth soccer speed drills have a clear purpose, enough recovery, and a progression that matches the child. Cones, flat markers, a ball, and open grass are enough for most of the work below. Keep maximal efforts early in practice, introduce complexity gradually, and stop before tired movement becomes the habit you're rehearsing.
1. Linear Acceleration Sprints (10–20 m)
Speed quality trained: first-step force and acceleration. Use these when a player reacts promptly but struggles to separate from an opponent.
Set a starting line and a finish line on level grass, leaving clear space beyond the finish for gradual slowing. The setup should stay simple.
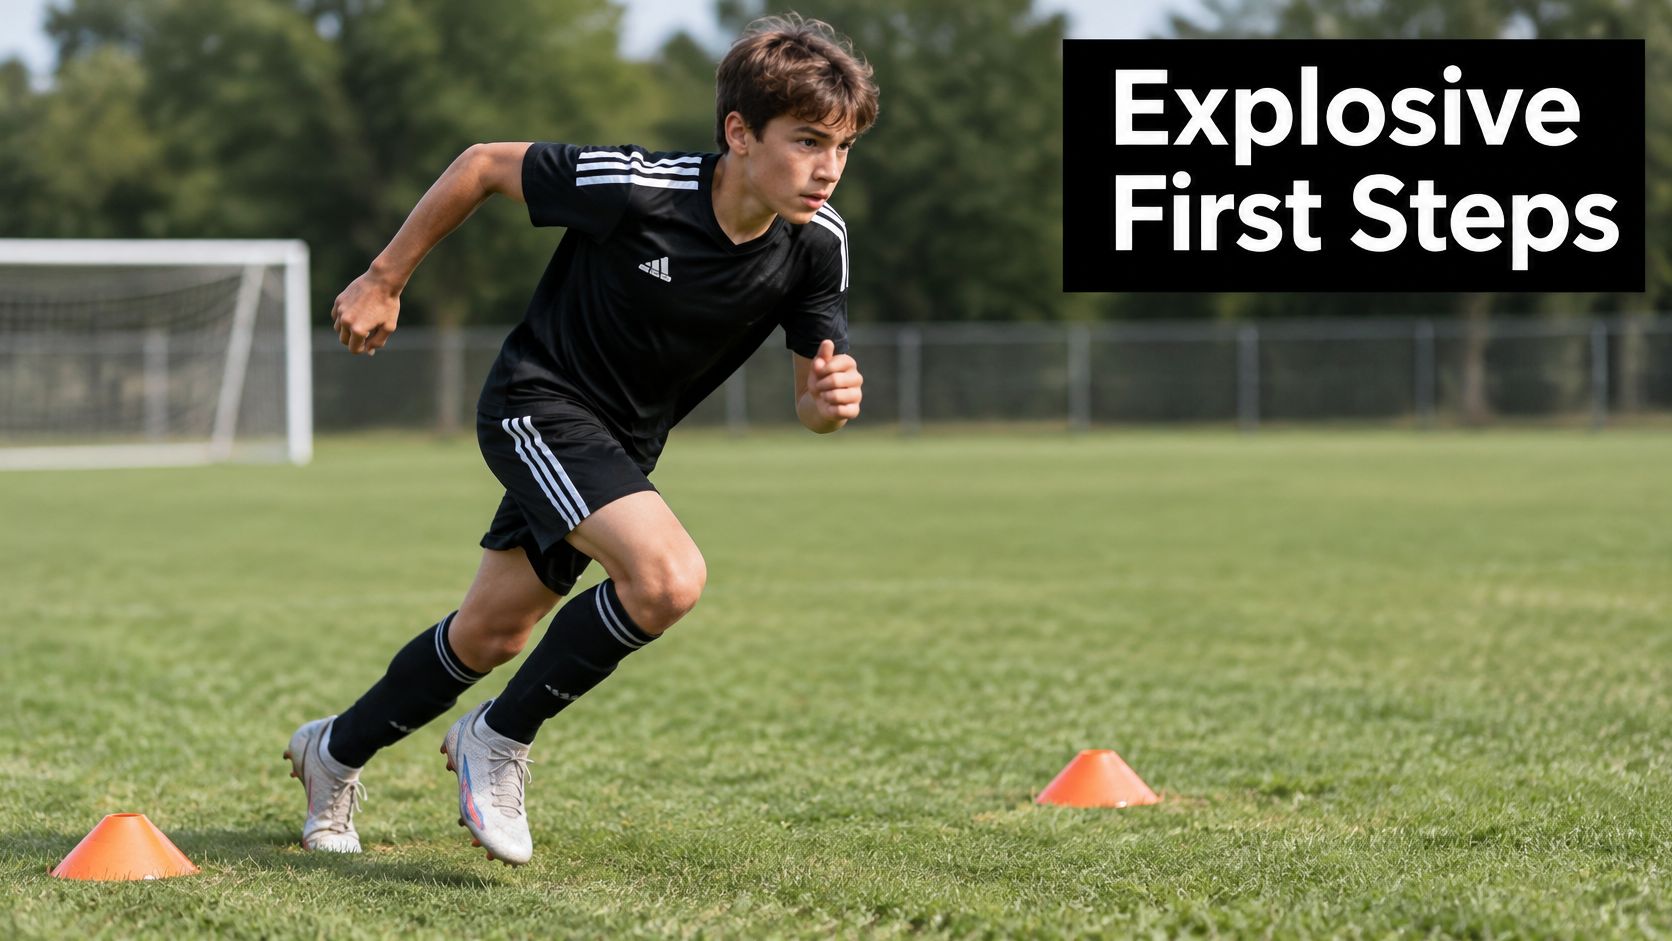
Start from a comfortable staggered stance, push backward into the ground, and accelerate through the finish. Coach a whole-body forward lean, not a bend at the waist, with purposeful arm action and powerful opening steps.
For a practical starting dose, the youth soccer sprint assessment guidance recommends 4–6 maximal repetitions over 10–20 m with 60–120 seconds of recovery, prioritizing technique and stopping when speed visibly declines. Walking back isn't necessarily enough recovery; let the player settle before asking for another maximal effort.
Progress the start before adding resistance
Younger beginners: Use playful races toward a marker, with a finish close enough that attention and posture stay organized.
Developing players: Introduce staggered starts and races against a well-matched partner.
Experienced players: Add different starting orientations, then consider supervised resistance only when they can maintain sound mechanics.
A useful team application is acceleration work after a progressive warm-up and before passing practice. Use these soccer warm-up exercises to prepare movement gradually rather than sending cold players straight into races.
Practical rule: Sprint through the finish, then slow down in the run-out area. Don't teach players to brake before the line.
2. Agility Ladder Footwork Drills
A player can become excellent at ladder patterns without becoming a faster sprinter. Use the ladder for coordination, rhythm, and movement preparation, not as a substitute for covering ground at speed.
Lay a flat ladder on stable ground, or mark boxes with chalk on a suitable surface. Begin with a straightforward stepping pattern, then introduce in-and-out movements or a lateral shuffle once players can stay balanced without staring at their feet.
The useful coaching cues are simple: relaxed shoulders, coordinated arms, and feet landing underneath the body. If the player clips the ladder repeatedly, slow the pattern down rather than demanding faster feet.
Make the exit useful
For a developing team, place a receiving station beyond the ladder. Players complete the pattern, leave under control, scan toward a teammate, and receive a pass.
That sequence connects coordination with soccer technique, but the ladder itself still isn't training maximal acceleration. Keep the distinction clear when planning the session.
Simplify: Let younger children step through comfortably before introducing sideways movement.
Progress: Change the movement direction or add a controlled receiving action, rather than piling on complicated patterns.
Rest: Allow an unhurried reset between passes through the ladder. Stop when players begin rushing or losing balance.
The beginner soccer footwork drills offer complementary ball-based work. Choose patterns that children can learn quickly enough to spend their attention on movement quality.
Use ladders briefly during activation or a coordination station. When acceleration is the priority, save the freshest efforts for sprinting, not increasingly elaborate footwork sequences.
3. T-Drill (Cone Agility Test)
The T-drill trains planned movement, not reactive agility. Players already know where they're going, which makes it useful for teaching braking, lateral travel, and transitions without adding a decision.
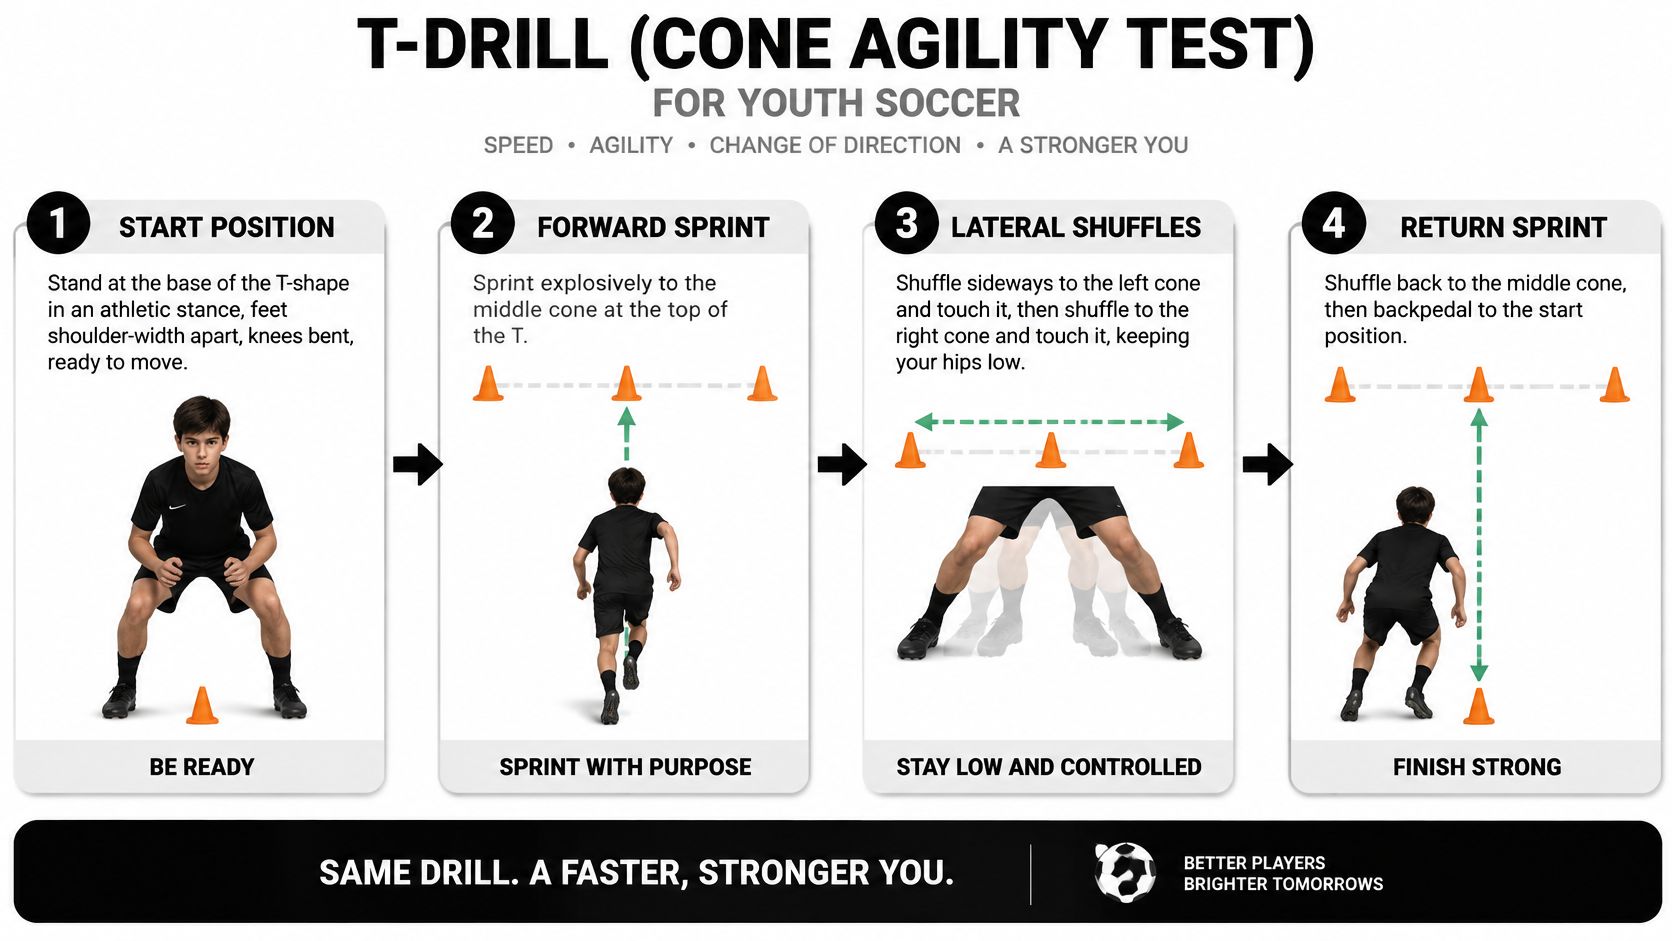
Arrange flat markers in a T shape. Players accelerate from the stem toward the crossbar, shuffle across it in both directions, return to the center, and move backward toward the start.
Walk the route before increasing intensity. A player who can't remember the sequence isn't ready for a meaningful timed attempt.
This diagram illustrates the movement sequence.
Coach the transitions
Ask players to lower their hips before changing direction, keep their trunk controlled, and push away from the ground rather than reaching sideways. During the shuffle, keep feet from crossing and avoid an excessively wide stance that makes the next push awkward.
A useful application is a defensive movement station: rehearse closing space, shifting laterally, and recovering while maintaining balance. Don't imply that a fixed shuffle pattern reproduces every defensive situation.
For younger players, shorten the layout and rehearse its parts separately. Older players can complete the full sequence with greater intent, but backward travel still needs a clear lane and controlled speed.
A faster time isn't progress if the player skips the route, loses balance, or changes the movement rules.
Give players a complete recovery before another demanding attempt. If you time it, keep the layout, surface, start position, and movement requirements consistent, and compare the player with their own previous efforts rather than rewarding only the fastest child.
4. 5-10-5 Pro Agility Shuttle
The 5-10-5 shuttle exposes a common problem: a player accelerates hard, arrives upright at the turn, and needs extra steps to stop. Treat it as a braking-and-reacceleration drill before treating it as a race.
Mark a center line and turning lines to either side. Start at the center, sprint to a side, reverse across the full course, then turn again and finish through the middle.
Use visible lines or flat markers instead of tall cones where players plant their feet. Keep the turning area clear so nobody lands on equipment.
Teach the stop before chasing the time
Begin below full speed and watch the approach to each turn. Players should lower their body before the line, shorten their final approach steps, and keep the plant controlled rather than reaching far outside their base.
Approach: Brake progressively instead of asking the final foot contact to absorb everything.
Turn: Keep the knee tracking with the foot and avoid a planted twist.
Exit: Push decisively into the new direction instead of standing upright first.
For an older competitive player who loses ground after defensive recoveries, rehearse each turning direction separately before connecting the full shuttle. Start toward both sides so the drill doesn't hide a less confident turn.
Younger children can use a shortened, untimed version with a simple instruction to reach a line, turn safely, and return. A hand touch can standardize the task, but don't insist on it if it causes an awkward collapse at the turn.
Let breathing settle and leg control return between efforts. Repeated shuttles with incomplete recovery become conditioning, which isn't the same task as improving a sharp change of direction.
5. Illinois Agility Test
Choose the Illinois course when you want to observe repeated planned changes of direction across a longer sequence. Don't choose it as the default solution for a player whose main limitation is the opening burst.
The course combines straight running, turns, and weaving around central markers. That makes it useful for observing route control, but its complexity also creates opportunities for a player to improve by learning the path.
Demonstrate the course and allow a controlled familiarization before recording performance. Use the same published layout whenever calling the result an Illinois test; if you shorten or alter it, label it a modified course.
Separate movement assessment from conditioning
A useful preseason application is to watch an older player negotiate the course while a coach records where control breaks down. Look beyond the final time: does the player brake late, take unnecessarily wide turns, or lose posture through the weave?
Those observations help you choose subsequent practice. A player who struggles at tight turns may need isolated braking work rather than repeated attempts at the entire course.
Keep conditions consistent: Record the layout, surface, footwear, start procedure, and timing method.
Allow recovery: Wait until the player is ready to reproduce the effort, not merely willing to go again.
Modify: Shorten the route for younger players, but don't compare the result with a full-course time.
Coach a controlled lean into curves, with eyes looking ahead rather than down at each cone. Don't force tight footwork at a pace the player can't manage.
If you're using the course for conditioning, say so. Fatigued repetitions can challenge sustained effort, but they shouldn't be presented as clean measurements of fresh change-of-direction ability.
6. Hexagon Footwork Drill
A hexagon marked on the ground gives players a compact space to practice balance and controlled directional contacts. It isn't a sprint drill, and being quick around the shape doesn't establish that a player can accelerate effectively across the field.
Use chalk or flat tape on an appropriate surface. On grass, choose flat markers that won't catch a foot or move beneath a landing.
Start in the middle and step outward across a side, then return. Introduce gentle hopping only when the player can land softly and remain balanced.
Earn the faster contacts
Watch the landing before watching the tempo. Ask for soft knees, a stable trunk, and controlled contact through the forefoot without holding the heels rigidly off the ground.
Beginner adaptation: Step between the center and the outside, pausing to regain balance.
Developing adaptation: Add gentle two-foot hops in a predictable direction.
Advanced adaptation: Consider single-leg variations only when basic landings remain comfortable and controlled.
For a younger team's coordination circuit, a coach can call a direction and have children step out and return. That keeps the task playful without demanding repeated high-impact contacts.
Quality check: If landings become loud, knees collapse inward, or balance requires extra recovery steps, reduce the difficulty.
Give players time outside the shape between sequences. Don't keep them bouncing while you explain the next pattern, because those extra contacts still add workload.
This drill fits early in a session as a brief coordination activity, provided it doesn't tire the legs before sprinting. Skip hopping when a player reports pain, and avoid using it to push through soreness associated with a recent increase in training or a growth-related change in comfort.
7. Reactive Sprint Drill with Visual or Verbal Cues
A player who looks quick in a planned course may still hesitate when an opponent moves. Reactive sprinting adds a choice before the acceleration, making it a useful complement to rehearsed movement.
Keep the first setup uncluttered, with clear destinations and separate running lanes.
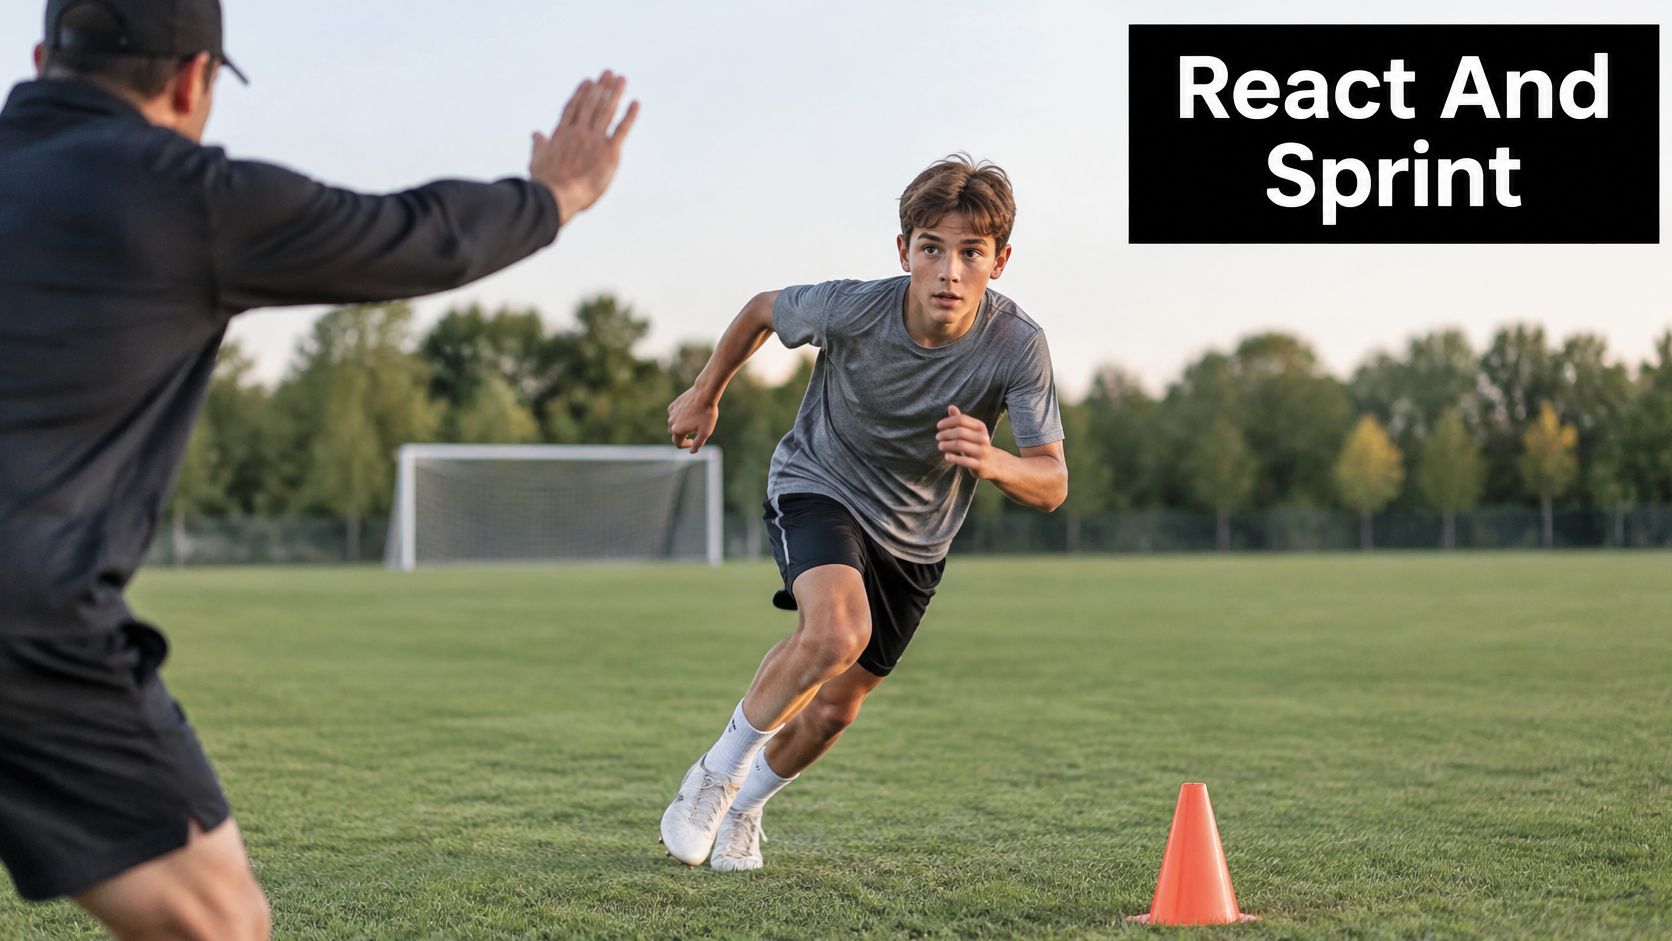
Place colored markers in different directions and have the player begin from a comfortable ready position. Point or call a color, then let the player accelerate toward the matching marker and slow safely beyond it.
Vary when you give the signal, but keep its meaning consistent. Confusing instructions test memory and guessing rather than the movement decision you intended.
Progress toward soccer information
Begin with clear colors or hand signals. Once players understand the task, use a partner's movement, a pass into space, or an attacker choosing an exit.
For example, a wide player can react to a partner's movement, accelerate into space, then receive a pass. Add the ball after the initial sprint before asking the player to dribble throughout; that preserves a clear acceleration task while introducing technical execution.
Younger players: Use playful chase-and-escape games with obvious boundaries.
Developing players: Add a receiving action after the sprint.
Competitive players: Use an opponent's movement as the cue and keep the starting situation relevant to their position.
These agility drills for soccer players provide complementary movement ideas. Allow full recovery between sharp efforts, and simplify the task when hesitation comes from unclear rules rather than reading the cue.
Use the demonstration as a movement reference, adapting the setup to the player's readiness.
Youth Soccer Speed Drills at a Glance
Drill | Primary Quality Trained | Equipment Needed | Best Age Range | Setup Time |
|---|---|---|---|---|
Linear Acceleration Sprints (10–20 m) | First-step quickness and acceleration | Two cones; stopwatch optional | U8–U12, with distance adjusted by age | Quick setup |
Agility Ladder Footwork Drills | Foot speed, coordination, and rhythm | Agility ladder | U10–U14; adaptable to other ages | Quick setup |
T-Drill (Cone Agility Test) | Multidirectional agility and change of direction | Four to five cones; stopwatch | U12–U16 | Simple cone layout |
5-10-5 Pro Agility Shuttle | Deceleration and re-acceleration | Cones; stopwatch | U14–U18 | Quick setup |
Illinois Agility Test | Repeated direction changes and agility endurance | Cones; stopwatch | U15–U18 | More involved course setup |
Hexagon Footwork Drill | Foot speed, balance, and coordination | Tape or small cones | U8–U12; suitable for all ages | Minimal setup |
Reactive Sprint Drill with Visual or Verbal Cues | Reaction time, decision-making, and first-step speed | Cones; coach or partner for cues | Youth players; adaptable by skill level | Quick setup |
Putting It All Together Without Overloading the Week
Don't squeeze every drill into every session. Choose the speed quality that needs attention, then protect enough freshness to train it well.
Treat this weekly template as a starting framework, not an extra workload layered onto every team practice, camp, and match.
Early week, when recovered: Complete a progressive warm-up, then linear acceleration work before technical training. If players are still fatigued from the weekend, move the demanding work rather than forcing it.
Midweek: Choose a planned braking task, such as the T-drill or shuttle, followed by a small amount of reactive work. Don't stack every change-of-direction course together.
Before a game: Use familiar, light footwork and progressive running to prepare players. Avoid exhausting shuttle competitions or unfamiliar hopping patterns.
Individualization matters: a study of sprint exposure across youth development levels associated accumulated sprint distance with improved maximum-speed capacity in several age groups, while no external-load measure predicted acceleration capacity. Track sprint exposure separately instead of assuming a busy practice covered every speed quality.
Measure consistently and adjust honestly
For formal monitoring, the youth sprint measurement guidance recommends gates at 0, 10, and 20 m, at least two trials, full recovery, and retaining the best valid effort. Keep the starting position and equipment setup unchanged.
Younger children need playful tasks and simple instructions; developing players need patient mechanics coaching; older athletes need work matched to their position and total load. Reduce demanding work after tournaments, and adjust during growth-related discomfort or declining coordination.
Pain isn't a cue to push harder. General injury prevention guidance for active adults isn't a child-specific prescription; persistent pain warrants assessment by an appropriate healthcare professional.
Build speed through consistent, high-quality practice over months, not an exhausting afternoon. At Villarreal Houston Academy, the official Villarreal CF partner academy in Greater Houston, our development approach emphasizes age-appropriate coaching within a structured pathway.
Villarreal Houston Academy offers select and competitive soccer programming for boys and girls from age 4 upward, connecting athletic development with technical skill and game understanding. Visit Villarreal Houston Academy to explore programs and find an age-appropriate next step for your player's development.
Comments